5 feb 2011

Jack Skeleton


Por fin! Este amigurumi me ha costado lo suyo. Creo que si no fuera porque iba destinado a un amigo, habría acabado desistiendo. Y es que entre que con lana negra no veo tan bien como con otros colores los puntos y que algunas cosas no me convencían mucho tal y como quedaban con el patrón, ha sido un poco odisea. 

Por ejemplo, al pecho le he quitado una vuelta entera en la parte blanca, y no lo he aumentado tanto como decían las instruciones, porque me quedaba así como barrigón. Y los ojos, en lugar de lo que dice el patrón, he hecho simplemente un anillo mágico de 5 pts, y 10 en la siguiente vuelta, es decir, dos puntos bajos en cada punto. Además, lo del cuello se enrollaba y quedaba muy feo, así que para mantenerlos tiesos no se me ha ocurrido nada mejor que darles laca del pelo. Seguro que hay algún modo mejor, pero no se me ha ocurrido!!. 

Este es el original, y aunque esté mal decirlo, me gusta más cómo me ha quedado a mi, además mi Jack posa con un estilo mucho más "cool", je, je ;).
El patrón lo podeis encontrar aquí. Es un poco complicado de entender en algunos puntos, así que si os animais a hacerlo y teneis problemas no dudeis en preguntarme, ok?


19 ene 2011

Gru, mi villano favorito

Os presento a Anselmo. Anselmo es un minion, como todos estos otros amigos suyos:
Qué majos, eh? Son los personajes de la película "Gru, mi villano favorito". Mi hermana vió la peli y se enamoró de estos bichillos, así que aquí estaba yo para hacerle uno. Afortunadamente encontré el patrón del amigurumi muy rápido, podeis disponer de él de forma gratuíta aquí. Está en inglés, para variar, pero merece la pena el esfuerzo, porque es una monada! 
Este es el patrón:

HEAD/BODY:

Rnd 1: 7 sc in magic ring (7)
Rnd 2: 2 sc in each sc around (14)
Rnd 3: sc in next sc, 2 sc in next sc around (21)
Rnd 4: sc in next 2 sc, 2 sc in next sc around (28)
Rnd 5: sc in next 3 sc, 2 sc in next sc around (35)
Rnd 6-31: sc in each sc around (35)
Begin stuffing at this point. Stuff moderately firmly while shaping. Continue to stuff as you progress.
Rnd 32: sc in next 3 sc, dec over next 2 sc around (28)
Rnd 33: sc in next 2 sc, dec over next 2 sc around (21)
Rnd 34: sc in next sc, dec over next 2 sc around (14)
Rnd 35: dec over next 2 sc around (7)
F/O. Add any stuffing needed to finish out the shaping. Weave tail through final round and tug gently to close up. Secure ends, weave in.
OVERALLS:
Using blue

Rnd 1-5: same as for the Head/Body
Rnd 6-10: sc in each sc around (35)
Do not fasten off at end of round 10.

(now working in rows)

Row 1: Sc next 10 sc, ch 1 and turn (10)
Row 2-6: sc in each sc across, ch 1 and turn (10)
F/O. Weave in ends.

With the newly made panel facing you, from the left side of this panel, count 7 sc around (on row 10 of base of overalls) and attach yarn to the next sc.
Row 1: Sc in same sc as joining. Sc in next 10 sc, ch 1 and turn (11)
Row 2-6: sc in each sc across, ch1 and turn (11)
F/O. Weave in ends.
For the straps of the overalls, Ch 9, sc in second chain from hook and each remaining ch across, (8)
F/O. Weave in ends.

Fit the overalls over the bottom of the body section. Attach straps to the upper corners of each of the panels as shown. (Don't sew the overalls to the body just yet)

ARMS/HANDS:

Beginning at the hand using black yarn:
Rnd 1: 4 sc in magic ring (4)
Rnd 2: sc in next sc, 2 sc in next sc, sc in next sc, 2 sc in next sc (6)
Rnd 3: sc in each of next 3 sc, ch 3, sc in 2nd ch from hook and next ch, sc in each of remaining 3 sc of round (6 sc and 1 'thumb')
Rnd 4: sc in each sc around (hold thumb down to to the front as you sc behind it) (6)
Rnd 5: working in front loops only, 2 sc in each sc around (12)
F/O and weave in ends.

Attach yellow to any free loop from round 5.

Rnd 1: sc in same free loop as joining. Sc in each of next 5 free loops around (6)
Rnd 2-12: sc in each sc around (6)

As you work, stuff the arm lightly to shape but don't overstuff. Continue to stuff as you progress. It's much easier to do this as you go than to try to stuff it after it's done, since the arms are so thin.

Flatten the last row of the arm so that the thumb of the hand will be facing towards the body and pin to body as shown.

FEET (make 2):
(using black)

Rnd 1: 6 sc in magic ring (6)
Rnd 2: sc in next sc, 2 sc in next sc around (9)
Rnd 3-5: sc in each sc around (9)
Rnd 6: sc in next sc, dec over next 2 sc around (6)
F/O. Stuff foot lightly. You just want to give the some some substance and shape, without overstuffing, as you'll want to very slightly flatten the foot to more resemble shoes.

PANT LEGS (make 2):
(using blue)

Chain 11, join to form a ring.
Rnd 1-3: sc in each sc around (11)
F/O. Sew the bottom of the pant leg to the top of the foot/shoe as shown. Stuff the 'leg' moderately firm while shaping. Pin the upper portion of the leg to the bottom of the overalls as shown.

EYES/GOGGLES:

Eye ball (make 2):
Using white:

Rnd 1: 15 sc in magic ring, pull your 'draw string' very tightly to close up the ring (15)
Rnd 2: sc in next sc, dec over next 2 sc around (10)
F/O. Tuck the loose yarn ends into the dome of the eyeball (add a tiny bit of stuffing if you want)
Goggle Rims (make 2):
Using gray:

Rnd 1: 8 sc in magic ring (8)
Rnd 2: 2 sc in each sc around (16)
Rnd 3: working in back loops only, sc in each sc around (16)
Rnd 4: sc in each sc around (16)
F/O. Tuck the eyeball into the 'goggle' as shown. Once you're happy with the look, secure the eyball inside the goggle (I used a sewing needle and some gray sewing thread to do this, so as not to add any bulk to the outside of the goggle rims). Sew the two 'eyes' to each other in a figure 8 shape as shown (a few stitches with that gray sewing thread is good for that as well, as it won't add any unwanted bulk to the goggles)


GOGGLE STRAP:
Using black:

Row 1: chain 28 (check this to make sure it's the right length to go around the head and attach to each
side of the 'goggles', add or remove chains as needed).
DC in each chain across (again, check this for size before F/O, and adjust as needed)
F/O and weave in ends. Sew the strap to either side of the goggle rims as shown.

ASSEMBLY:

Fit the overalls over the body as shown and pin in place. Pin arms as shown (this minion's arms reach about to the bottoms of the feet). Once you're pleased with the positioning of the arms (thumbs to inside of each hand), sew in place. Sew overalls in place.

Attach legs to bottom of overalls, sew securely in place.
Place goggles over the top of the head and position as desired, once you're happy with the placement of the goggles/eyes, sew securely in place.

Cut two small circles of black felt and either sew or glue in place on the eyeballs.

For mouth: On this minion, I just used some of the yellow yarn, and whipstitched around one row of sc for a few scs to create the 'pouty' lower lip and then took a large stitch across the top and slightly below the 'lip' to create the shape. Tug very gently on this large stitch to create the look of the mouth.

Hair: I cut several strands of black, and tied in the middle with another strand. I folded the 'bundle' in half to create the 'shock' of hair and sewed this in place to the middle of the top of the head.

The insignia on the overalls is made by cutting a circle of black, and a square of the blue … the blue square is placed in the center of the black circle and glued in place then a smaller circle is glued to the center of the blue square and placed on the overalls in the center front as shown.

Y ya sabeis, si algo no se entiende, preguntad!

Editado: A Anselmo le ha salido un hermano, que podeis ver aquí: http://moshandcompany.blogspot.com.es/2012/11/otro-minion.html

13 ene 2011

El Conejo Malvado


Que cara de malo, ¿eh? Luego en realidad es un buenazo, pero es que el pobre es un poco feucho. Que no, que no, que no es feo. Es gracioso. Cuando le estaba bordando la cara estuve tentada de dejarle con un solo diente, porque quedaba de lo más gracioso a lo Cuñao . Pero ya lo que le faltaba, ja, ja! Nunca había hecho un amigurumi cuadrado, pero es más fácil de lo que pensaba. 

El patrón lo he copiado de este blog, donde teneis una versión grande que utilizan como alfiletero, que es la que he hecho yo, y una más pequeña, para llevar el muñeco como colgante en el bolso, tal que asi:

Espero que os guste, este amigurumi es muy rápido de hacer!

Os pongo a continuación el patrón de la versión grande (en inglés, lo siento. Pero os ayudo en lo que necesiteis!!)


Eye
R1: With white yarn, make 6 sc into a ring, sl st 1 and fasten off.
Embroider on a pupil with black yarn.

Body
R1: With the body color of your choice, ch 17, turn, sc inc in the 2nd ch from the hook, sc in next 14 ch, sc inc in next ch, continue to work along the bottom of the starting chain: sc inc in next ch, sc in next 14 ch, sc inc in next chain. Continue working in the round. (36)
R2: sc inc in next st, sc in next 16, sc inc in next 2 st, sc in next 16 st, sc inc in next st (40)
R3-R17: Work even (40)
R18: sc in next st, sc next 2 st tog, sc in next 18 st, sc next 2 st tog, sc in next 17 st (38)
R19-R20: Work even (38) This is a good time to sew on the eye and embroider the face.
R21: sc in next st, sc next 2 st tog, sc in next 17 st, sc next 2 st tog, sc in next 16 st (36)
R22-R23: Work even (36)
R24: sc in next st, sc next 2 st tog, sc in next 16 st, sc next 2 st tog, sc in next 15 st (34)
R25: Work even (34)
R26: sc in next 8 st, skip next 22 st, sc in next 4 st. Continue to work in the round over the last 12 st, to form the first leg (12)
R27: sc in next st, sc next 2 st tog, sc in next 9 st (11)
R28: sc in next st, sc next 2 st tog, sc in next 8 st (10)
R29: sc next 2 st tog, sc in next 8 st (9)
R30: sc next 2 st tog, sc in next st, around (6) Fasten off.

Reattach yarn in the 14th stitch of R25.
R26: sc in next 12 st. Continue to work in the round over these 12 st, to form the second leg (12)
R27: sc in next 5 st, sc next 2 st tog, sc in next 5 st (11)
R28: sc in next 4 st, sc next 2 st tog, sc in next 5 st (10)
R28: sc in next 4 st, sc next 2 st tog, sc in next 4 st (9)
R30: sc next 2 st tog, sc in next st, around (6) Fasten off.

Sew up the holes in the feet. Stuff the body semi-firmly through the opening in the crotch, then sew up the crotch as well.

Arms (make two)
R1: With the body color of your choice, make 6 sc into a ring.
R2: sc inc in next st, around (12)
R3-R9: Work even (12) Fasten off.

Do not stuff the arms, but fold them flat at the top and sew them to the sides of the body.

Longer ear
R1: With the body color of your choice, make 6 sc into a ring.
R2: sc inc in next st, around (12)
R3-R10: Work even (12) Fasten off.

Shorter ear
The ears are lopsided on purpose. To make the shorter ear, follow the pattern for the longer ear, but fasten off after 7 rounds.

Do not stuff the ears, but fold them flat. Then fold the bottom part in half and secure to create the crease in the ear. Sew the ears to the top of the head.

5 ene 2011

Regalo de Reyes

EDITADO: He cambiado los enlaces de Megauload por RapidShare

Sorpresa!!! Como regalo de reyes, pongo para que podais descargar gratis todos los libros de amigurumis que he ido recopilando en estos dos meses. En algunos casos es imposible saber el nombre original,  asi que vereis que alguno me he tenido que inventar. Si alguien tiene alguna reclamación de copyrights, que me lo comunique, que sin problemas lo quitaré de aquí. No son libros ni revistas que yo haya escaneado,  si no que los he encontrado de forma gratuíta en otras páginas, por eso entiendo que no debería haber ningún problema. Si algún enlace no funciona o me he equivocado, decidme por favor para que lo arregle, ok? 
Empezamos!!! 


                   Tejer la Moda                   


29 dic 2010

Brujita 2

 
Al final esto va a parecer un aquelarre!!! Esta es otra bruja con el mismo patrón que utilicé para esta otra. Solo le he cambiado el color del pelo, y los ojos, que esta vez los he intentado hacer con pestañas. Prefiero hacer cosas que no haya hecho antes, pero mi ama vió la otra bruja y le pareció tan mona para llevar colgando del bolso que cualquiera le dice que no!! Y encima en navidad. Vamos, que no he tenido opción, ja, ja!!
Por cierto, FELIZ NAVIDAD!!

19 dic 2010

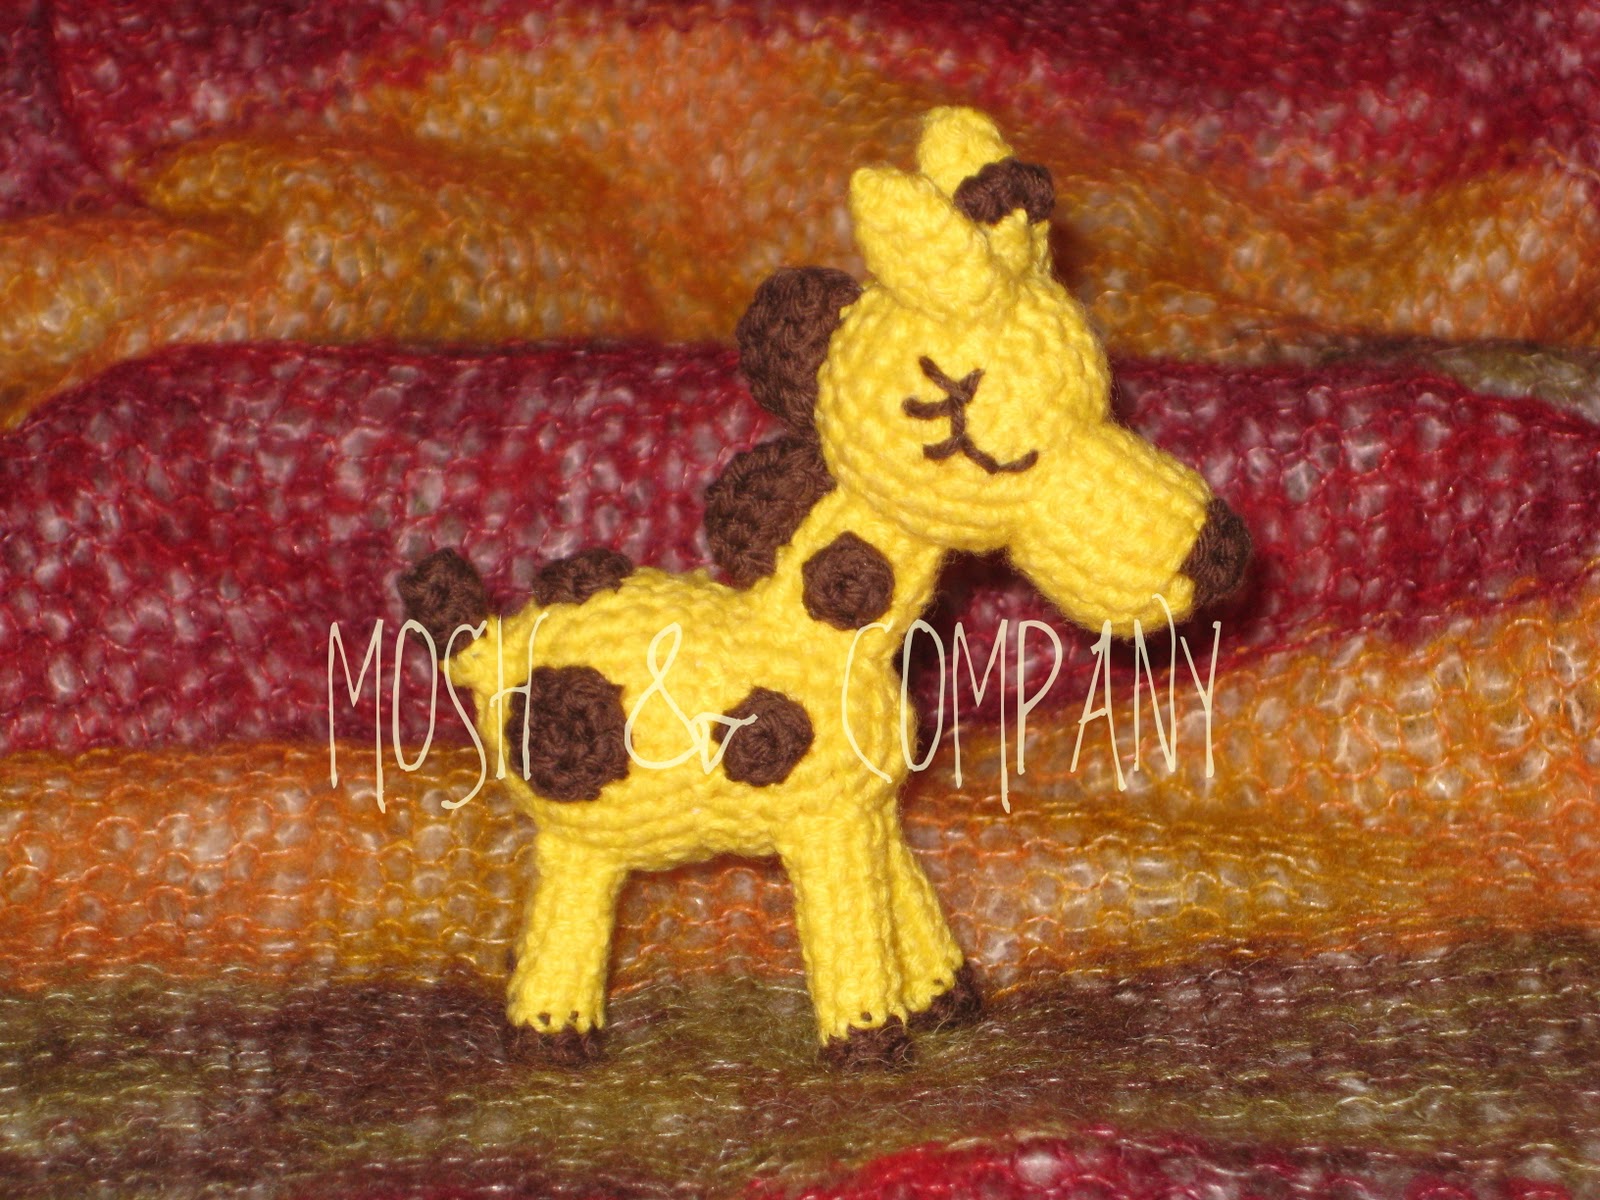
Otra jirafa

Mi segunda jirafa, aunque no se parece en nada a esta otra.  Esta es mucho más pequeña, pero no por eso lleva menos trabajo, al contrario. Al final son tantas piezas, que la parte de coser cada una me ha llevado más tiempo que el tejerlas. Pero es tan bonita que no importa. Aqui os incluyo el patron. Una pista bastante importante, que os facilitará las cosas si decidis hacerla: en las partes que pone es marrón. El resto, amarillo. Cuidado con partes como las patas o los cuernecillos, que van combinados. Pinchad en las imagenes para verlas ampliadas. Animo! 


12 dic 2010

Osito con Bufanda

Me gustan estos amigurumis más elaborados, pero ¡qué pereza me da unir todas las partes! Es el primero que hago con tela, y me gusta cómo queda. Tengo guardadas varias camisetas viejas, de esas que no quieres tirar porque la tela es bonita, y siempre dices: "Para algo me servirá". Et voilá! Para algo van a servir! 
El patrón es de  Pica-Pau. Lo explica excepcionalmente bien. Así es como le queda a ella:


9 dic 2010

Hello Kitty disfrazada

Está mal que lo diga yo, pero esta Hello Kitty me ha quedado adorable!! Y eso que en la foto no se aprecia en su justa medida. A pesar de todo, no me cae nada bien esta gata , me resulta demasiado cursi, pero al ser para una bebé era el muñequito perfecto. En el patrón ponía que iba a tener una altura de casi 20 cm., pero a mi me ha quedado de unos 8-9 cm, ideal para el abrigo de la nena, que era para lo que  lo quería su madre. El patrón lo he sacado de este libro:  Hello Kitty en Crochet
Esta es la imagen del libro con el amigurumi original. Igual igual no me ha quedado, pero en fin, se hace lo que se puede!! 


3 dic 2010

Mini bruja

Pequeñita pequeñita es esta bruja. Para que os hagais idea,en  la foto está sentada en la manilla del mueble del baño. Medirá como unos 5 cm. Es la primera vez que pongo pelo, pensaba que era más complicado. Bueno, Link lleva pelo, pero no es lo mismo, que no se le puede peinar, ja, ja! Por eso a la bruja le he hecho una coleta a un lado, aunque la original lleva una par de trenzas. No sé si me hubiera quedado mejor con ojos postizos, pero es que no encuentro en ningún sitio. ¿alguien sabe donde venden? 

Este es el patrón:

Leg (make 2):

Rnd 1: With black, ch 2, 6 sc in second chain from hook. (6)
Rnd 2: Sc in each st around, changing to cream in last 2 loops of last st. 
Rnd 3-4: Sc in each st around. 

For first leg, join with sl st in first st. Fasten off.
For second leg, do not sl st in first st. Do not fasten off.

Head and Body:
Rnd 1: Hold legs together with upper inner thighs together. Insert hook in the center on innermost thigh of first leg, pull out the loop from second leg, sc in same st  (do not count this st just for connecting legs together), sc in next 5 sts on second leg (mark first st), sc in next 5 sts on first leg, changing to black in last 2 loops of last st. (10)
Rnd 2: (2 sc in next st, sc in next 4 sts) 2 times. (12)
Rnd 3: (Sc in next st, 2 sc in next st) around. (18)
Rnd 4: Working in back loops only. Sc in each st around. 
Rnd 5: (Sc in next st, sc next 2 sts tog) around. (12)
Rnd 6: (Sc next 2 sts tog, sc in next st) around, changing to cream in last 2 loops of last st. (8)
Rnd 7: (Sc in next st, 2 sc in next st) around. (12)
Rnd 8: (Sc in next st, 2 sc in next st) around. (18)
Rnd 9: (Sc in next 2 sts, 2 sc in next st) around. (24)
Rnd 10-13: Sc in each st around. 
Rnd 14: (Sc in next 2 sts, sc next 2 sts tog) around. (18)
Rnd 15: (Sc next 2 sts tog, sc in next st) around. Stuff. (12)
Rnd 16: Sc next 2 sts tog around, sl st in first st. Fasten off. Sew opening close. (6)
Skirt:
Rnd 1: Working in front loops of round 3 of the body and head pointed towards you. With black, join with sl st, ch 1, sc in same st, sc in each st around. (18)
Rnd 2: Sc in each st around.
Rnd 3: Sc in each st around, sl st in first st. Fasten off. 

Arm (make 2):
Rnd 1: With cream, ch 2, 5 sc in second chain from hook. (5)
Rnd 2-3: Sc in each st around.
Rnd 4: Sc in each st around, sl st in first st. Fasten off.

Sew arms to body.

Witch hat (pink):
Rnd 1: With pink, ch 2, 6 sc in second chain from hook. (6)
Rnd 2: Sc in each st around.
Rnd 3: (Sc in next st, 2 sc in next st) around. (9)
Rnd 4: Sc in each st around.
Rnd 5: (2 sc in next st, sc in next 2 sts) around. (12)
Rnd 6-7: Sc in each st around. 
Rnd 8: (2 sc in next st, sc in next 3 sts) around.(15)
Rnd 9: Sc in each st around.
Rnd 10: (Sc in next 4 sts, 2 sc in next st) around. (18)
Rnd 11: Sc in each st around. 
Rnd 12: (Sc in next 2 sts, 2 sc in next st) around.(24)
Rnd 13: (Sc in next 3 sts, 2 sc in next st) around. (30)
Rnd 14: Working in front loops only. (Sc in next 4 sts, 2 sc in next st) around. (36)
Rnd 15: (Sc in next 5 sts, 2 sc in next st) around, join with sl st in first st. Fasten off.(42)

Hair:
With Mohair yarn (red), cut 30 pieces of 6 “ (16 cm) long. For fringe, hold 1 strand of yarn, fold in half. With wrong side facing, insert hook in free loop of rnd 13, draw the folded end through the stitch and pull the loose ends through the folded end, draw the knot up tightly. Add fringe around.
Sew hat on head. For hair you can do the pigtails or braids as you wish.

Esta es la bruja original, copiado de aqui
Por cierto, su dueña está encantada con ella!!

30 nov 2010

Dragón

 
Este dragón amigurumi ha sido bautizado como "Jambisou". Curioso, no? Es el nombre que le ha puesto el hijo de su destinataria. Es super fácil de hacer, excepto la cresta, que me costó un poco. Y como veo que acabo haciendo cada vez que algo relacionado con el ganchillo se me complica, me lo acabo inventando.

Este es el patrón:
Body:
R1: 6sc in ring
R2: inc in every st around (12sc)
R3: sc in first, inc in next, rep around (18sc)
R4: sc in first 2, inc in next, rep around (24sc)
R5: sc in first 3, inc in next, rep around (30sc)
R6: sc in first 4, inc in next, rep around (36sc)
R7: sc in first 5, inc in next, rep around (42sc)
R8-24 sc around (add eyes and mouth)
R25: (back loops only) sc in first 4, dec in next, rep around (36sc)
R26: sc in first 3, dec in next, rep around (30sc)
R27: sc in first 2, dec in next, rep around (24sc)
R28 sc in first, dec in next, rep around (18sc)
STUFF
R29: dec untill closed FO
Feet (make 2)
R1: 6sc in ring
R2: inc in every st around (12sc)
R3-5: sc around
FO leave tail to sew
Sew flat to the front loops of R25
Hands (make 2)
R1: 6sc in ring
R2: sc around, inc 2 times randomly (8sc)
R3-4: sc around
FO leave tail to sew
Tail
R1: 4sc in ring
R2: inc in first, sc around (5sc)
R3-4: Sc around
R5: inc in first, sc around (6sc)
R6: sc around
R7-11: inc in first, sc around (11sc)
R12: sc around
R13-18: inc in first, sc around (17sc)
R19-20: sc around
FO, Stuff, Leave tail to sew.
Belly Patch
Ch6
R1: 5sc across chain, ch1 turn
R2-3: 5sc, ch1, turn
R4: Skip first 2, 6dc in 3rd st, skip 2, ss
R5: sc around shape, FO leave tail to sew
Spikes
Ch4, *sc in first chain from hook, dc in next, trc in next, ch4, rep from * untill you have 4 spikes
Ch3, *sc in first, dc in next, rep from * untill you have 6 small spikes, FO, leave tail to sew,
Sew from tip of tail to top of head.
Si alguien necesita ayuda con el inglés que me diga, ya le hecho un cable. 
El original era tal que asi:

27 nov 2010

Link, el muñequito del Zelda

Mi pequeño gran logro. No creía que fuera capaz de hacer este amigurumi, me parecía demasiado complicado. La cabeza gira sobre una bola interna y se le quitan las botas y el gorro. Lo terminé además en una ubicación de excepción. La chicas de Artileak  me invitaron a acompañarlas a la Nihon Jaia, donde exponíamos nuestros amigurumis. Fijaros en la preciosidad de stand que nos quedó:

El acto de inauguración.
Y lo bien que me nos lo pasamos!!! Artileak son un grupo de gente que quedan para tejer y charlar en Bilbao. Ese día no conocí a todo el grupo, pero todo se andara. Poco a poco.

Se me olvidaba, el patrón de Link también es by the face aqui. Aunque viendo el original no se parece mucho al mio. El pelo en realidad me lo inventé, porque no viene explicado como el resto.

24 nov 2010

Jirafa

De momento este es el amigurumi más grande que he hecho. La hice verde porque era para el niño de una amiga, y ese es por lo visto su color favorito, y no le pega mal. Además, no tenía naranja ;)

La original, con el patrón gratis incluído, está aqui.


Conejito orejas largas

Me encanta este. No se parece mucho al original, porque me lié con los ojos, que no me quedaban bien, y al final me los acabé inventando. Y la verdad es que no me disgusta el resultado.
El patrón es este:


CABEZA Y CUERPO (en una sola pieza)

1) anillo de 6 mp
2) *2 mp en cada mp* (1 aumento en cada uno de los 6 mp), quedan 12 mp en total
3) * 1mp, 2 mp en el sig mp* ( tejer un medio punto,luego un aumento en el sig, repetir de *a *) quedan 18 mp
4) *2mp, 2mp en el sig mp* (tejer 2 mp, luego un aumento en el sig mp, repetir de *a*), 24 mp total
5) *3mp, 2 mp en el sig mp*, repetir de *a *, 30 mp en total
6) *4mp, 2mp en el sig mp*, repetir de *a *, 36 mp total
7) a 12) 36 mp (sin aumentos ni disminuciones)
13) *4mp, una disminución* (tejer 4 mp, luego 2 mp juntos-disminución-, repetir de *a*), quedan 30 mp en total
14) *3mp, una disminución*, repetir de *a*, 24 mp total

A esta altura, les recomiendo bordarle la carita y colocar los ojos (de los plásticos que se consiguen en las mercerias, o algún botón de bebé chiquitito)

15) *2mp, una disminución*, repetir de *a*, 18 mp total
16) *1mp, una disminución*, repetir de *a*, 12 mp en total

Y aquí rellenar con vellón siliconado (para mí, la mejor opción, quedan blanditos y esponjositos)

En este momento, se empieza a tejer el cuerpo, se vuelven a hacer aumentos:

17) *1mp, un aumento*, repetir de *a *, quedan 18 mp en total
18) a 21) 18 mp (sin aumentos ni disminuciones)
22)* 1 mp, una disminución*, repetir de *a*, 12 mp total

Rellenar el cuerpo con vellón

23) *una disminución en cada mp*, quedan 6 mp. Cerrar dando un puntadita para que no quede un agujero ni se escape el vellón.


PATITAS:
1) un anillo de 4 mp
2)*1 aumento en cada mp*, repetir de *a*, 8 mp en total
3)* 1mp, un aumento*, repetir de *a*, 12 mp en total
4) 12 mp
5) *1 mp, una disminución*, repetir de *a*, 8 mp en total
6) y 7) 8 mp
Rellenar con un poquito de vellón.
8) *1 disminución en cada mp*, repetir de *a*, 4 mp total. Cerrar dejando una hebra larga para coser al cuerpo.
Hacer otra igual.

MANITAS:
1) un anillo de 4mp
2) *1 aumento en cada mp*, repetir de *a*, 8 mp en total
3)y4) 8 mp
5) *1 disminución en cada mp*, repetir de *a*, 4 mp en total. No se rellena (es muy chiquita). Dejar una hebra larga para coser, hacer otra igual.

OREJAS:
1) un anillo de 6 mp
2)*1 aumento en cada mp*, repetir de *a*, 12 mp en total
3) *1 mp, 1 aumento en el sig mp*, repetir de *a*, 18 mp en total
4) a 6) 18 mp
7) *1 mp, una disminución*, repetir de *a*, 12 mp en total
8) a 12) 12 mp
13) *1 mp, una disminución*, repetir de *a*, quedan 8 mp en total. No se rellena, dejar una hebra larga para coser.

La parte rosa de la oreja la tejí haciendo una cadena de 8 puntos (incluyendo una para subir), a continuación se tejen 6 mp sobre esa cadena, luego 2 mp en la última cadena (un aumento) y se continua tejiendo sobre esa misma cadena (la parte de abajo de la cadena) y se tejen otros 7 mp.


Y el conejito original es este, ya veis la diferencia!!

Por cierto, el patrón está copiado de : http://amigurumiobsession.blogspot.com/2010/06/conejito-llavero.html

Oso panda

Este pobre me ha quedado con cara de asustado. O igual es porque le subí al radiador y se quemaba el trasero! Con este creo que me pasé con el relleno, tanto que antes de ponerle los ojos estuve lanzandolo contra las paredes, que no veas cómo rebotaba!! Patrón gratis aqui, aunque está en inglés. Si hay algún enlace que no funciona, si me avisais lo arreglo, porque tengo todos los patrones guardados.

Pingüino rechoncho

Este es una pocholada de amigurumi. Es muy fácil de hacer, y queda tan rechoncho que no te vas a poder resistir a espachurrarlo. Los ojos son abalorios sin más. Le puse una cadeneta en la coronilla porque su madre de adopción lo quería usar para colgar en el bolso. 
El patrón también es gratis, y se puede ver aqui, y además está en castellano.

Amigurumi mosqueado

Este amigurumi a día de hoy ya no me gusta mucho, la verdad. Me gusta como quedó, pero no me parece tan mono como los que le han ido sucediendo. Pero en fin, en su día me pareció gracioso. Eso si, era sumamente fácil, y eso pudo ser lo que me atrajo de él en su momento.
El patrón es este, aunque no recuerdo de dónde lo cogí, era gratis, asi que supongo que no hay problema en que yo también lo comparta. Está en ingles, si necesitais ayuda me decís. 

SC = Single Crochet
INVDEC = Invisible Decrease
INC = Increase (2 SC in one stitch)
Head
CH2 or Magic Ring
1. SC 6 (6)
2. INC in each stitch (12)
3. SC then INC; repeat (18)
4. SC 2 then INC; repeat (24)
5. SC around (24)
6 & 7. Repeat row 5 for rows 6 and 7 (24)
8. SC 3 then INC; repeat (30)
9. SC around (30)
10 & 11. Repeat rows 9 for rows 10 and 11 (30)
12. SC 2 then IN; repeat (40)
13. SC around (40)
14 – 16. repeat row 13 (40)
17. SC 2 then INVDEC; repeat (30) (stuff)
18. SC then INVDEC; repeat (20)
19. SC 2 then INVDEC; repeat (15) (stuff)
20. SC then INVDEC; repeat (10)
21. INVDEC x 5 (or fewer)
Finish Off then weave in tail
Stump Body
CH 2 or Magic Ring
1. SC 6 (6)
2. INC in each stitch (12)
3. SC then INC; repeat (18)
4. SC around (18)
5. Repeat row 4 (18)
6. SC 4 then INVDEC; repeat (15)
7. SC 3 then INVDEC; repeat (12)
8. SC around (12)
Do not Finish Off!
Foot (make 2)
CH 2 or Magic Ring
1. SC 5 (5)
2. INC in each stitch (10)
3. SC around (10)
4 – 8. repeat row 3 for rows 4 to 8 (10) (stuff tip of foot only lightly)
9. SC then INVDEC; repeat (7)
Finish off and leave a long tail

Y el original tenía esta pinta: